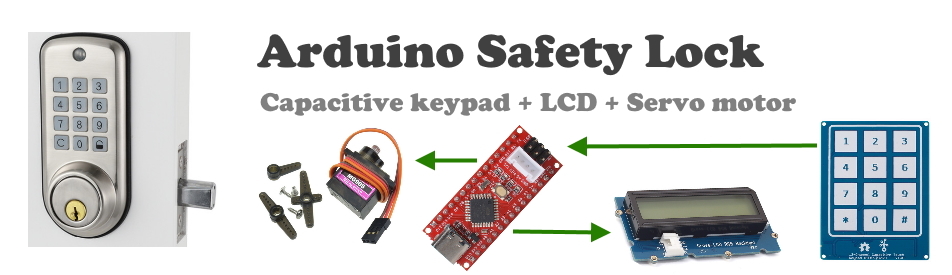
(c) 20 Feb 2020 by Vassilis Serasidis


Inroduction

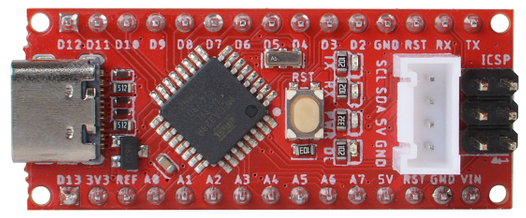
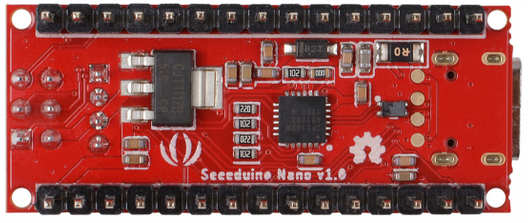
A few days ago I ordered the new Arduino Nano from Seeed. This board has the same pinout with the classic Arduino Nano but has two main advantages

1.
USB Type-C instead of the previous Mini-USB for powering and programming the board
2. A four-pin I2C connector is added to easily connect multiple
Grove I2C sensors and actuators.


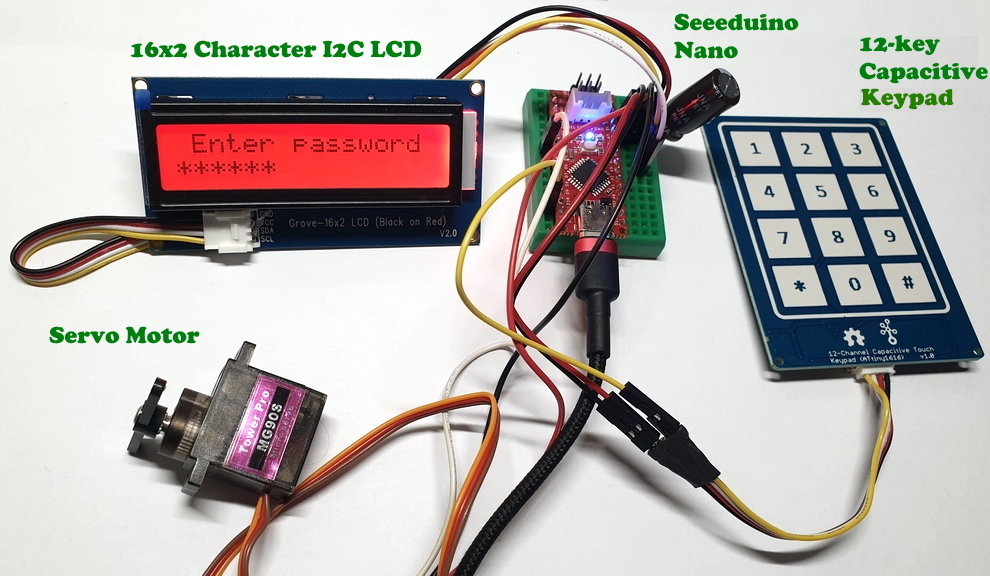
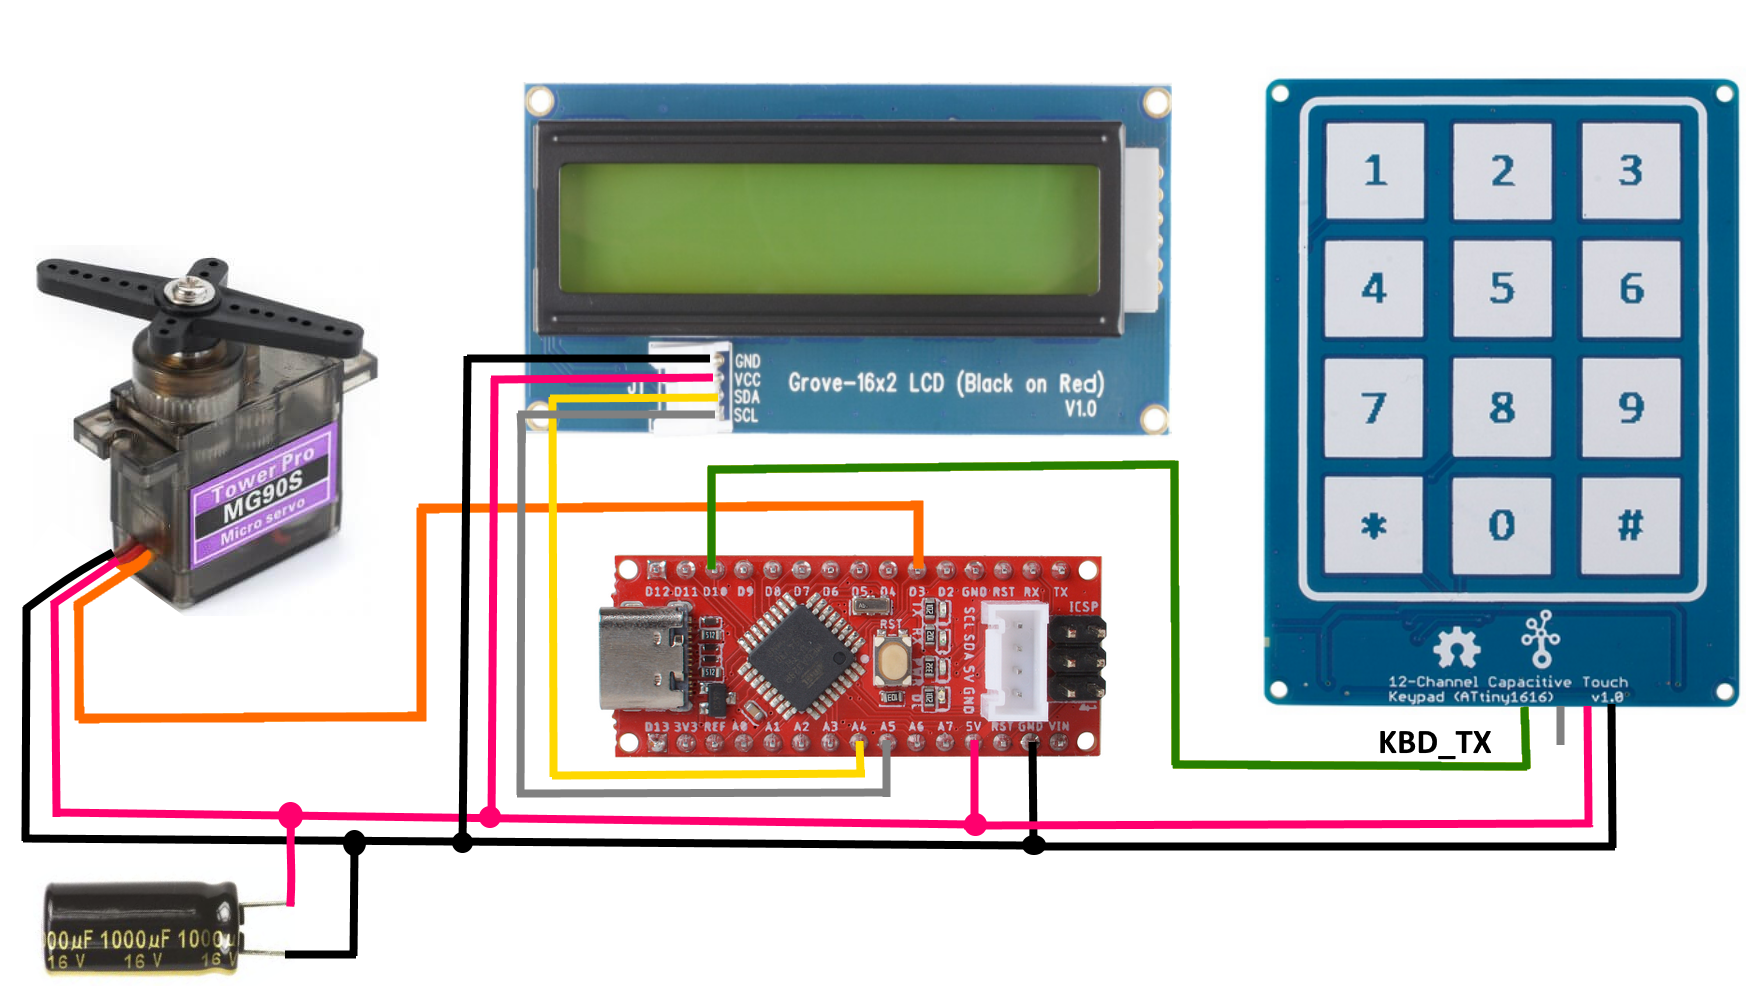
If you only want to connect one Grove I2C sensor, then the on-board connector is enough. But if you want to connect more than one, you shoud consider buying a
shield for Arduino Nano. In my case, I split a four-pin cable into two parts and I connected the 12-key capacitive keyboard + I2C LCD + Seeeduino Nano between them, creating a demo safety lock circuit. A servomotor is also required to open the door latch mechanically.


How it works

The LCD screen displays a message asking the user to enter the password. The default password is: <
1036> and it's stored in the microcontroller's Flash memory. After entering the password, the user must press the '#' key that acts as <Enter>. If the user makes a mistake in entering the password, he can clear it by pressing the Asterisk '*' key. If the user has entered the correct password, Servo Motor will turn a few degrees to open the door. After two seconds, the Servo Motor will return to its original position. One 1000 uF / 16V capacitor is added along with the + 5V servo power cables to eliminate servomotor turbulence.


The Source Code

I wrote a simple sketch just to try out the new items I bought. You can easily modify it and make it more complex to fit your needs (Change Password, User Access List, etc.). This project requires four libraries:

1.
Wire (included in the Arduino IDE)
2.
Servo (included in the Arduino IDE)
3.
SoftwareSerial (included in the Arduino IDE)
4.
rgb_lcd (Download it from Github)


/*
 * Electronic Safety Lock v2
 * 
 * (c) 2020 by Vassilis Serasidis
 *  Home: https://www.serasidis.gr
 *  email: <avrsite@yahoo.gr> , <info@serasidis.gr>
 *  
 * Components:
 * 1. Arduino compatible board (http://tiny.cc/dqclkz)
 * 2. 12-key Capacitive Touch Keypad (http://tiny.cc/3nclkz)
 * 3. Grove - 16x2 I2C LCD (http://tiny.cc/2uclkz)
 * 4. Servo Motor (http://shorturl.at/dfuSX)
 * 
 * How to Use
 * 1. Power ON the circuit
 * 2. Enter the default password <1036> 
 * 3. The Servo Motor will unlock the Door
 * 
 */

#define SERVO_1          3 /* D3 as output. Drives the Servo motor */
#define SERVO_ON       160
#define SERVO_OFF       20

#define KBD_TX          10  /* Pin D10. Data from Capacitive Keyboard to Arduino (9600 bps) */
#define KBD_RX          11  /* This pin is not used */
#define KBD_ASTERISK  0x0A  /* <*> */
#define KBD_ZERO      0x0B  /* <0> */
#define KBD_SHARP     0x0C  /* <#> */

#include <Wire.h>
#include <Servo.h>
#include "rgb_lcd.h"
#include <SoftwareSerial.h>

const byte my_password[] = {1,0,3,6};
const byte SIZE_OF_MY_PASS = sizeof(my_password);
byte success_digits = 0;
byte lcd_position = 0;

Servo myservo;  /* create servo object to control a servo */
rgb_lcd lcd;
SoftwareSerial CapKeypad(KBD_TX, KBD_RX); // Arduino RX, Arduino TX


void setup() {
  
  CapKeypad.begin(9600);
  pinMode(KBD_TX, INPUT);
  lcd.begin(16, 2);
  clear_lcd_password_area();
  myservo.attach(SERVO_1);
}

void loop() {

  if(read_keyboard() == true){ /* If the typed password is correct, */
    unlock_door();             /* unlock the door */
  }
}


boolean read_keyboard(){
  byte val;
  
  if(CapKeypad.available() > 0){
    val = CapKeypad.read() - 0xe0; /* Remove the prefix 0xE0 from the keyboard value */

    if(val == KBD_ASTERISK){ /* <Clear password> Button */
      clear_lcd_password_area();
      return false;
    }

    if(val == KBD_ZERO){ /* <0> : Replace the Zero-Button value */
      val = 0;  
    }
    
    if(val == KBD_SHARP){ /* <Enter> Button */
      if((success_digits == SIZE_OF_MY_PASS)&&(success_digits == lcd_position)){
        success_digits = 0;
        return true; 
      }else{
        lcd.clear();
        lcd.print(F(" Wrong password"));
        delay(1000);
        lcd.clear();
        clear_lcd_password_area();
        return false;
      }
    }

    if((lcd_position < 14)&&(val < 0x0a)){
      lcd_position++;
      lcd.write('*');
    }

    if(val == my_password[success_digits]){
      success_digits++;
    }else{
      success_digits = 0;
    }

  }
  return false;  
}

void clear_lcd_password_area(){
  lcd_position = 0;
  success_digits = 0;
  lcd.setCursor(0, 0);
  lcd.print(" Enter password");
  lcd.setCursor(0, 1);
  lcd.print(F("                "));
  lcd.setCursor(0, 1);
}

void unlock_door(){
  lcd.clear();
  lcd.print(F("Door is unlocked"));
  myservo.write(SERVO_ON);
  delay(2000);
  lcd.clear();
  lcd.print(F(" Door is locked "));
  myservo.write(SERVO_OFF);
  delay(2000);
  clear_lcd_password_area();
}


The Wiring diagram


Safety lock in action


(c) 2020 by Vassilis Serasidis